Thursday, May 31, 2012

Week 22: M&M Peanut Butter Bars

The title of this post gives you 2/5 of the ingredients for the recipe.


I love one bowl recipes. Even more, I love one bowl, five ingredient recipes. This one is peanut butter, M&M's, Bisquick, eggs and brown sugar. Yum.

When I was at the mall the other day, I stopped at Mrs. Fields and got an M&M cookie. It took me back to my childhood when my mom would take us to Mrs. Fields and let us each pick out a cookie at the end of our shopping adventure. I always got the sugar cookie with M&M's on it. This was honestly not because it was the best or anything like that...but it was the biggest cookie in the case. Oh yeahhhh. Cookies. That gave me the M&M bug. I'm trying to clean out my pantry a little bit. I have a lot of things in there and sometimes I forget about them. I made chocolate pretzel bits at Christmas time so I had Christmas colored M&M's in the back of the pantry. I searched foodgawker for a recipe and got this guy. A simple bar that looked delicious and was. I made it on a Sunday, brought one in for myself on Monday and one of the summer interns asked if I had brought one for everyone since the previous Monday I had brought that delicious cake. So, I bought in my cookie bars and shared.


3/4 cup peanut butter
2 large eggs
1 cup packed brown sugar
2 cups all-purpose baking mix (Bisquick, for example)
1 bag of M&Ms (estimate this, see note)

Preheat oven to 325*F. Spray an 8-inch square pan with cooking spray.

Combine peanut butter and eggs until well mixed and smooth.
Add in brown sugar and stir until combined.
Stir in baking mix until moistened. Fold in M&Ms.
Spread mixture in greased pan and bake for 35-40 minutes or until golden brown.


*Note: I'm not sure what the original author meant by "1 bag of M&M's." Figure out what ratio of M&M to bar you want and go from there. I just threw the rest of mine in there. Also, the mixture is crazy thick. I had to knead the M&M's in. This makes it easy to judge how many M&M's you want in there.*

Friday, May 25, 2012

Week 21: Lasagna Cups


I made crab rangoons as an appetizer for Christmas Eve Dinner. That is when I discovered how easy wonton wrappers are to work with. I only used half a package of them in December and still had half a package left. I scoured my usual places for a recipe that would use them up and didn't involve frying anything. I had a couple of bags of open cheese and some goat cheese that I needed to use up, so I just threw it all together until I had the amount that the recipe required. It would be really easy to add whatever you wanted to these. Less cheese and more veggies? Go for it. Meat in the sauce? Yes, please. Also, don't use 6 month old wonton wrappers. Mine looked pretty shady, so I bought new ones because they're relatively cheap. 

I have a question that I've been pondering lately. It's pretty life altering. Why is it, when you cook or reheat anything with cheese on or in it, the pasta or bread or whatever stays a warm or normal temperature, but the cheese  becomes a BOILING MASS OF LAVA?! I do not understand. Can someone explain?

Lasagna Cupcakes
originally from Andy and Belle

11/2 cups part skim ricotta cheese
24 small square wonton wrappers
11/2 cups shredded mozzarella cheese
11/2 cups shredded sharp cheddar cheese
1 tspn chopped basil
1 tspn chopped oregano
Spaghetti sauce (whichever your favorite is)
Preheat oven to 350º

In a large bowl, mix ricotta, chopped basil, chopped oregano, salt and pepper all together and set aside.
 
Coat your muffin pan with non stick cooking spray or butter.
 
Place a wonton wrapper at the bottom of each cup.
 
Start layering by adding a small layer of ricotta mix in the 12 muffin cups, followed by the spaghetti sauce, topped with the mozzarella and cheddar cheese then covered with another wonton wrapper.
 
Repeat the process until each muffin cup is full.
 
Finish it all off with more mozzarella and cheddar cheese.
 
Bake until cheese is melted and bubbly (around 10 minutes).
 

Week 20: Chocolate Truffle Cake (for my Mom, Part II)

My little brother turned 21 about a month ago. We drank. That is all.

"little" brother and me at a wedding

Before we drank, we ate. Mom was visiting Boston, so Dad came out to Ann Arbor and took Christopher and I out to dinner at Grizzly Peak. I'm always a fan, but more so tonight. Christopher eats at least twice what I do. After we stuffed ourselves with delicious dinners, the waitress came over and asked if we wanted dessert. Christopher immediately asked for the Chocolate Truffle Cake. 

It. Was. Epic.

It was a smooth and chocolately and epic. Did I mention that already? GP serves it with espresso ice cream, but I'm not a fan of coffee. Once I tasted this cake I immediately knew this was what I would be making for Mother's Day dessert. 


Look at that cake, don't you want a slice?

We topped it off with some homemade hot fudge sauce. Make this. Right now. Epic.

Since this made a 9-inch cake, we didn't finish it. It is not possible for 4 people finish this cake in one sitting unless it's all you're eating. I left a couple extra slices at home and took the rest to work. My coworkers quite enjoyed having cake during lunch on Monday. 

Chocolate Truffle Cake
originally from Gluten Free Goddess

1 cup whipping cream
2 1/2 cups semi-sweet or dark chocolate chips
1 stick (8 tablespoons) unsalted butter
2 tablespoons bourbon vanilla extract* or see notes
7 organic free-range eggs
1 cup light brown sugar
1/4 teaspoon fine sea salt

Preheat the oven to 350ºF. Line the inside bottom of a 9-inch Springform cake pan with a circle of parchment paper. Wrap a large piece of foil around the outside of the pan, covering the bottom and sides, to catch any leaking drips. Set aside.

In a medium sauce pan, gently heat the cream over low heat. When the cream is fairly hot, melt the chocolate chips by adding them slowly to the pan as you whisk. Add the butter, in pieces. Whisk until the chocolate and butter are melted. Add the vanilla extract. As soon as the mixture is melted, smooth, and glossy remove it from the heat.

Using a wire whisk attachment, beat the eggs, light brown sugar and sea salt until the eggs are foamy and doubled in volume, roughly 3-4 minutes.

Slowly add the cooling chocolate mixture to the eggs, and beat gently until combined.

Pour the batter into the prepared cake pan.

Bake in the center of a pre-heated oven for one hour, until the cake is set and cracked. It will still appear a bit loose in the center, underneath. This is fine.

Place the cake pan on a wire rack to cool. When the cake is close to room temperature, lightly cover and chill the cake overnight.

Before serving, gently loosen the cake from the sides of the pan using a thin flexible spatula. Release the Springform clasp and remove the ring. Place the cake on a cake plate.

*Note: When the recipe says to wrap the bottom of the springform pan with foil, do it. I don't care if your springform pan doesn't have a history of leaking, it will leak and you don't want this cake on the bottom of your oven.*

Week 19: Chiles Rellenos (for my mom, Part I)


I LOVE MOTHER'S DAY!

I love Mother's Day like a fat kid loves cake. 

Like Dobby loves socks. 

Like zombies like brains. 

Like vegan zombies like grains (ha!). 

Mother's Day means coming home on Saturday and spending the afternoon and evening putting together all the dishes that we're going to be eating for brunch the next day. On this years menu:

Baked Blintz

French Toast Casserole

Chesapeake Crab Quiche

Ham & Red Pepper Egg Muffins

Egg Strata

Monkey Bread

Fresh Fruit

Cranberry Bliss Bars

Does that list sound epic to you? Cause it is, believe me. I'm a sucker for brunch, so this is the ideal meal for me. Sweet and savory come together in a meal that should be the standard. Breakfast? Who needs it, lunch? Who cares! Brunch is where it's at. Yo. 

Three years ago I decided to make my mom dinner on Mother's Day. She spends all morning putting dishes into the oven and taking them out, making sure everyone has something to eat, cleaning up and then heading outside to work in her yard. It's the least I could do to make her some dinner. This year, I got overly ambitious. 

For whatever reason I got chiles rellenos in my head. I thought about them for at least two weeks before finally saying, yes, this is what I will make. I've had them only once before. That story involves a lot of tequila, my Aunt, and some coworkers (one of which was very underage). That's a story for another day.

The chiles are delicious. I really liked them, just give yourself more than an hour to make them. I did not manage my time well and Mom ended up pitching in and making the rice for me. Thanks Mom! Getting the seeds out of the pepper was horribly hard, stuffing them and "sewing" them back together was hard, frying things is kind of hard. I'm going to leave the chiles rellenos to the professionals.There are three parts to the recipe, the filling, the tomato sauce and the rest of the filling. That doesn't make sense, but it will soon I think.

Chiles Rellenos
originally from Closet Cooking
4 large poblano peppers (or 6 medium or 8 small)
4 eggs (separated)
2 tablespooons flour
1 cup flour
oil for frying
2 cups ranchero sauce (warm, see below)
1 cup jack and cheddar cheese (grated)
1 handful cilantro (chopped)

Directions:
1. Broil the poblano peppers on the top oven rack until blackend on all sides.
2. Place the peppers in a plastic bag and let them sweat for 10-15 minutes before peeling the skins.
3. Make a small cut along the length of the pepper and scoop out the seeds.
4. Fill the peppers with some of the picadillo and seal the peppers back up with toothpicks.
5. Beat the egg whites until they form stiff peaks and then beat in the flour followed by the egg yolks one at a time.
6. Dredge the peppers in the flour and then dip them in the egg white batter.
7. Fry the peppers in oil heated to 350F until golden brown, about 3-4 minutes per side.
8. Place the chiles rellenos in a baking dish, pour the ranchero sauce over them and sprinkle with cheese.
9. Bake in a preheated 350F oven until the cheese has melted and the sides are bubbling, about 15-20 minutes.
10. Serve garnished with cilantro.

Picadillo
(makes 4 servings) 
1 pound ground pork
2 cups Ranchero Sauce
1/2 teaspoon cinnamon
1/4 teaspoon cloves
1/2 teaspoon oregano
1 tablespoon cider vinegar
1/4 cup raisins
1/4 cup pimento stuffed green olives (chopped)
1/4 cup slivered almonds (toasted)
salt and pepper to taste

Directions:
1. Cook the pork in a pan and drain any excess grease.
2. Add the tomato sauce, cinnamon, cloves, oregano, vinegar, raisins and olives.
3. Simmer until the sauce thickens, about 20 minutes.
4. Mix in the almonds and season with salt and pepper.


Ranchero Sauce(makes 4 servings)
 1 (28 ounce) can diced tomatoes
1 small onion (diced)
2 cloves garlic (chopped)
1 jalapeno (seeded and diced)
1 handful cilantro (chopped)
2 tablespoons corn oil
1/2 cup chicken broth
1 teaspoon cumin (toasted and ground)
salt and pepper to taste

Directions:
1. Puree the tomatoes, onion, garlic, jalapeno and cilantro in a food processor.
2. Heat the oil in a pan.
3. Add the tomato mixture, chicken broth and cumin and season with salt and pepper.
4. Bring to a boil and simmer until it thickens, about 10 minutes.

All of this wasn't quite enough for me to do, so I also made Mexican Rice. Yummy. 

"Authentic" Mexican Rice
 
1 Tbsp extra virgin olive oil or vegetable oil
1 cup uncooked long grain white rice
2 cups warm water
1 1/2 tsp Caldo de Tomate (I use Knorr brand)
1/2 tsp onion powder
1/2 tsp garlic powder
1/4 tsp freshly ground black pepper
1/4 tsp chili powder

In a mixing bowl whisk together water, Caldo de Tomate, optional onion powder, garlic powder, black pepper and chili powder, set aside. Drizzle oil into a non-stick saucepan and heat over medium high heat.  Add rice and cook several minutes, stirring constantly until rice is slightly puffed and golden. Add water mixture to rice then stir and cover pan with lid.  Reduce heat to low and allow rice to simmer for 20-25 minutes until water has been absorbed. Remove from heat, fluff rice with a fork, cover with lid and allow to rest 5 minutes. Serve warm. 


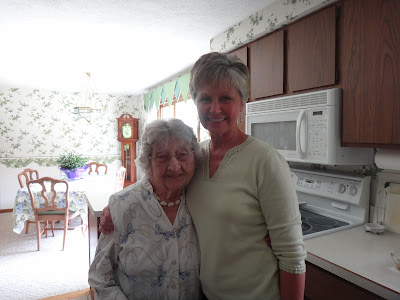
Here is my mom with Arvilla, our wonderful friend, who will be turning 102 years old in August. She's fabulous. She still comes to Mother's Day brunch and Thanksgiving dinner each year and eats a heaping plate full of food. I hope that I have such a healthy appetite when I'm her age.

Sunday, May 6, 2012

Week 18: Garlic Beef with Green Beans


I don't have much to write about this recipe. It's not my favorite. The best part was the sauce over the rice. The beef wasn't tender, the green beans were not cooked in a way that made them edible to me.  I would eat the sauce and rice all by themselves. Yum.  

If you really like green beans, try this recipe. If you can afford to spring for some really good beef, try this recipe. It just wasn't for me.

Garlic Beef & Green Beans
originally from Crepes of Wrath

2 tablespoons olive or peanut oil
2 pounds sirloin/top round/filet/flank steak (whatever you have on hand), sliced into long, thin strips
1 onion, diced
1 pound green beans, cleaned and de-stemmed
1/4 cup water (if needed)
Rice, cooked according to package directions (for serving)
For the sauce:
1 tablespoon olive or peanut oil
6 cloves garlic, minced
2/3 cup Hoisin sauce
2 tablespoons granulated sugar
2 tablespoons low-sodium soy sauce
1 to 2 teaspoons Sriracha (I used 2 teaspoons)
1/3 cup water

Slice your beef into long, thin strips. Heat 2 tablespoons of olive or peanut oil in a large saute pan over high heat and add in your beef. Cook for 3-5 minutes, until almost completely cooked (it can still be a little pink, as it will continue to cook a bit on the plate) and remove with a slotted spatula onto a plate with paper towels so the juices drain a bit.

Drain all but 2 tablespoons of juices out of your pan and add the diced onion. Cook for 5 minutes over medium-high heat until softened, then add in the cleaned and de-stemmed green beans. Add in 1/4 cup of water, if needed (just enough so the beans can steam), and cook for 5 more minutes, stirring frequently.

While you cook the onions and green beans, heat 1 tablespoon of olive or peanut oil in a small sauce pan over medium heat, then add in your minced garlic. Cook for 3 minutes, until fragrant, then add in the rest of the sauce ingredients. Stir to combine, then cook over medium-high heat for 3-5 minutes until bubbling and slightly thickened.

Add the sauce to the pan with the onions and green beans and cook over medium-high heat until thickened a bit more (about 3 minutes). Add in the beef and cook until heated through (about 3 minutes). Serve over rice or more vegetables. Serves 4 (or serves 5 when served over rice).

Week 17: Roast Chicken Risotto

I like to cook.

My roommate likes to cook.

My roommates boyfriend likes to cook.

This leads to some very delicious dinners that we cook together!


I'm the baker. I like measuring things out and knowing exactly how much of something is going into the bowl. That's why my kitchen scale is probably one of my favorite kitchen tools.

My roommate is Sarah. Yes, we're both called Sarah. It only leads to confusion every great once in a while. She'll come home and rummage through the cupboards and the fridge and come up with these amazing concoctions. I can't do that.

Her boyfriend, Elliot, who is practically my roommate too, will start talking about food and zeroes in on exactly what we want.

The day of roommate dinner Sarah and Elliot picked me up from work and we started driving to the grocery store. On our way, Elliot started naming things off. Did we want Mediterranean? Italian? Did we want pasta? Chicken? What veggies? We narrowed it down to risotto (since I'd never had it) and peas and chicken. Elliot whipped out the iPhone and we had a recipe. We used a rotisserie chicken since it was already cooked. We also added a lemon's worth of lemon juice and it made it very delicious.

Roast Chicken Risotto

butter
1 onion finely chopped
2 garlic cloves, finely chopped
350g risotto rice
1 large glass white wine
1½  cups chicken stock , heated to simmering (vegetable stock can be substituted)
a large handful frozen peas , defrosted
cooked chicken, torn into strips, no skin
50g Parmesan, grated
juice of one lemon

Melt a knob of butter in a large pan, add the onion and garlic and cook until soft and translucent. Stir in the rice until coated with butter.

Add the wine and stir until evaporated. Add the stock a ladle at a time until the rice is cooked but still with a little bite (add the peas and chicken in the last 5 minutes of cooking to heat through). 

The rice should be creamy but firm to the bite.
Stir in the Parmesan.

* Note: 1 1/2 cups of chicken stock ARE NOT enough. I think we ended up using an entire box of chicken stock. Just add what you think is necessary.