Monday, May 3, 2010

Molly Kitty (Lemon Souffle Pudding )


Sometimes the backlog of recipes and tasty things I have made gets long. I really can't remember why I made this dessert, other then I wanted to. I was home for the weekend or night and told them that I would make dessert.

I got this one from Joy the Baker one of my favorite food blogs. So colorful and tasty and she updates often which helps my daily glimpse into the food world. Remember those 12 or so blogs that I look at every day, hers is one of them.

I was a little confused as I was reading the recipe, but the lemon bit made me really want to make it. Lemon in the wintertime always makes things a little sunnier in an otherwise dreary time of year.

It was really simple to make. And magical. I haven't mentioned magical yet. You make stir two different batters together, fold them into one and MAGIC! When it's baked, there are two layers of deliciousness. The top is a cake type bit and the bottom is the pudding. All lemony and light. I think it would have been better cut into 4 slices instead of 8. Then we wouldn't have had to argue about who got the last pieces.

Lemon Souffle Pudding

1 cup granulated white sugar, divided
3 tablespoons unsalted butter, room temperature
3 large eggs, separated (I got to use my egg separator for the first time!)
1 teaspoon pure vanilla extract
2 tablespoon lemon zest
1/3 cup all purpose flour
1/4 teaspoon salt
1/3 cup fresh lemon juice
1 cup whole milk
1/8 teaspoon cream of tartar

Preheat oven to 325 degrees F and place rack in the center of the oven. Butter six – 1 cup (240 ml) ramekins or other heatproof bowls. I used one buttered 9-inch glass pie dish.

Set aside 2 tablespoons of the sugar to use when whipping the egg whites. Place the remaining sugar in a medium sized bowl. Add the lemon zest to the sugar. With the back of a spoon, or spatula, grind the lemon zest into the sugar, creating a fragrant, slightly yellow tinged sugar. It's really lovely. I hate working with zest, but in this case, it was worth it. Then, in the bowl of your electric mixer or with a hand mixer, cream the lemony sugar and butter. Add the three egg yolks, one at a time, and beat until incorporated. Beat in the vanilla extract. Add the flour and salt and beat until combined. With the mixer on low speed, gradually pour in the lemon juice and milk. Set aside while you beat the egg whites.

In a clean bowl of your electric mixer, or with a hand mixer, beat the egg whites until frothy. Add the cream of tartar and continue to beat until soft peaks form. This could take a while. I wish I had a stand mixer (hint hint, I like the red ones) Gradually add the remaining 2 tablespoons of sugar and beat until stiff peaks form. Gently fold the egg whites into the batter, in three additions, mixing only until incorporated.

Carefully pour the batter into the prepared ramekins. (The batter does not rise much during baking so you can fill the ramekins almost to the rim.) I poured the entire mixture into the 9-inch pie pan. Place the ramekins in a larger baking pan (or any size pan that will fit the ramekins and leave about 1 inch around the edges). Or place the 9-inch baking dish in a larger basting pan and set on your counter

Boil a tea pot of water to create a water bath. (A water bath is used to provide temperature protection for the eggs.) Place the basting pan with the souffle inside into the oven, carefully pulling the oven rack out a bit. Carefully pour in enough hot water so that the water is halfway up the sides of the ramekins or pie dish, and carefully slide the rack back into the oven.

Bake for about 40 – 45 minutes or until the sponge cakes are golden brown and a toothpick inserted into the cake portion comes out clean. Be careful not to insert the toothpick into the lemon sauce at the bottom of the ramekins. Remove the ramekins from the water bath and cool slightly before serving.

This dessert can be served warm or at room temperature. We liked ours plain or with some whipped cream. It was also suggested to put fresh fruit or dust it with powdered sugar. Yum.


In other news: I'm done with school for the summer! And a tree branch fell on my car and took out my mirror and part of my windshield. Great way to start what is supposed to be a lovely break from life.

Wednesday, April 21, 2010

Future of... (Pizza Muffins)

I check out about a dozen food blogs every day. Plus foodgawker.com. Every day.

Every day I find a new recipe I want to try. You can imagine how many recipes I have bookmarked now. I'm going to work my way through some of them this summer. Thanks to the government for helping me out with food as well as providing me a job (yay!) for the summer. I can't wait for school to be over (on Monday) so I can start cooking and baking again.

The other day I came across this food blog through foodgawker. What yummy recipe did I pick out? Pepperoni Pizza Puffs.

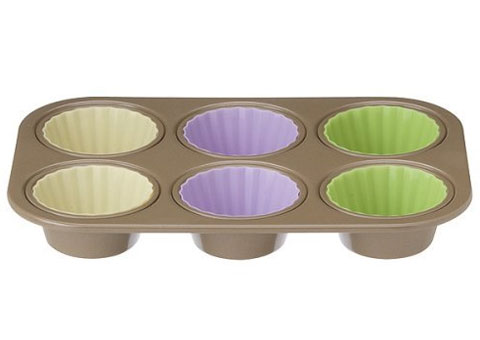
Over Spring Break Whitnie and I went shopping. We went to Kohl's and while we were there, we spent some money. I spent enough to get $10 in Kohl's cash. Goody. I went back and started my usual route. Clothes, bras/underwear, shoes, kitchen. I didn't really want to spend a lot of money so I was aiming for something until the $10. Guess what I found...Cupcake liners! How convenient that my parents gave me a cupcake/muffin calendar for Christmas. Just wait...the summer is going to be filled with cupcakes and muffins. Anyways, I got a dozen of the liners for about $6 cause they were on sale.

Back to the pizza though. I found those adorable mini muffin pizza puffs and thought to myself, "Self, those would be tasty full size." I mean, I LOVE miniature food. Seriously. It's amazing how much better something tastes when it's scaled down. Just ask Terry about the prospective fish cookies I'm making when we go fishing. (Yes, fishing.) He gets super excited even though it's a few months away. Again, back to the pizza. I was craving pizza. As an undergrad, I rarely ate pizza. Shocking, I know. So my pizza craving led to these tasty guys.

I ended up with 9 full sized muffins when the recipe said it would make 24 mini ones.

Pepperoni Pizza Muffins

3/4 cup flour
3/4 teaspoon baking powder
3/4 cup milk
1 egg, lightly beaten
4 ounces mozzarella cheese, shredded (about 1 cup)
4 ounces pepperoni, sliced or cut into small cubes (about 1 cup)
1/2 cup pizza sauce (or marinara)
2 Tablespoons finely chopped fresh basil

Preheat oven to 375o. Grease a 24-cup mini muffin pan or 9-12-cup regular muffin pan. In a large bowl, whisk together the flour and baking powder; whisk in the milk and egg. Stir in the mozzarella and pepperoni; let stand for 10 minutes.

Stir the batter and divide among the (mini-)muffin cups. Bake until puffed and golden, 20 to 25 minutes. Check after 10 or 15 minutes.

Microwave the pizza sauce until warmed through, then stir in 1 tablespoon basil. Sprinkle the puffs with the remaining 1 tablespoon basil. Serve the puffs with the pizza sauce for dipping.


You could really add whatever you want to these guys. Next time I'll probably put in some vegetables.

I obviously couldn't eat all 9 of mine at once, so I put half in the fridge cause Alex wasn't around to eat them. I reheated them in the toaster oven the next day and they were still tasty.

Tuesday, April 13, 2010

Happy Birthday Dear Chris! (Key Lime Pie)

For my friend's birthdays, I like to bake. That is my gift to them. Alex got a chocolate pumpkin pie for his birthday in October (and has bugging me for another one) so when I remembered that Chris' birthday was coming up, I asked what he wanted. He had tasted one of my key limes pie that I made last summer and that is what he wanted.
How pretty are these guys? Key limes are great. These little tiny limes that have little tiny seeds and are such pretty colors. The best time to squeeze key limes are when they're yellow. Yellow key limes give more juice and are much easier to juice then the green ones. Anyways, one pound of key limes will yield about a half a cup of juice. How convenient that that is all you need for one key lime pie. I prefer to squeeze them by hand, slicing them in half, picking out the seeds and squeezing each little half into a cup. This takes about half an hour. I also like to crush my own graham crackers for the crust...which takes a long time too. But, I will quote, "your crust is f***ing amazing." Yeah, crust that is completely hand done is AMAZING!

See that yellowish color, that is real key lime juice. If you're eating key lime pie that is green, stop immediately. It's not real. Real things are always better.

Key Lime Pie
1/2 cup key lime juice
4 egg yolks
1 can (12oz) sweetened condensed milk
1 package graham crackers
6ish tablespoons UNSALTED butter

Mix together the key lime juice, sweetened condensed milk and egg yolks. Beat them. Do not just stir...beat them. You want it to get a little bubbly. This way, it'll be more airy and tasty when it's done.

Melt about 6 tablespoons of butter and mix with crushed graham crackers. Add about 3 tablespoons of sugar in there too. Mix it all up and press into a 9" pie plate. Pour the key lime filling into the crust and then bake for about 10 minutes at 350. This will help it set and will make anyone feel better about the raw egg that has gone into it.

Since you have those egg whites sitting around, go ahead and beat them with a little sugar until stiff peaks form. That's meringue. Meringue your pie and bake for another 10 minutes, or until the meringue starts getting little brown bits on it. I've never had a success with meringue so I've never put it on a key lime pie. I like them plain or maybe with a little bit of chocolate drizzled on it. Yum!

Sunday, March 14, 2010

Only in New Harmony (Blackberry Apple Rustic Tart)


New Harmony, Indiana.

Seriously, who goes there? Well, there were these folks called Harmonites and then there was the Rapp family and all kinds of other religious beard wearing fellows who settled a town on the Wabash River and called it New Harmony.

What's there? Surprisingly, a lot. It's a cultural center. Music, art, theatre, architecture, etc all has it's place. A couple of famous architects built there. The Atheneum by Richard Meier and the Roofless Church by Philip Johnson. The food it pretty tasty too. I recommend the White House for brunch rather than dinner personally.

Why was I there? Studio of course. My professor this semester, Ben, lives in New Harmony and serves as our visiting professor. He stops into town once every other week or so and this is the second time we've come down to visit him. It's sweet. Really. I loved it.

Last time we went in the beginning of February and we bought a pig. He's a miniature pig and his name, because he was friends with Ben, was Jerry. Jerry was spared slaughter because the day he was going to die, the Midwest got a TON of snow. Ben's family was against blood on the snow in front of their house so Jerry got to live...until Friday. Ben was there when he died, but Grant, who was to be the executioner was not. Probably a good thing. The piggy parts were cooked over an outside fire at Ben's house last night and boy was he tasty. Along with the pig, Laura, Ben's wife, made a couple of side dishes and some biscuits. The sides were parsnips, a dish with sweet potatoes, onions and other things and Sam made a black bean and mango salad for her and her vegan friends. For me, I got to bake. :)

Laura mentioned that they had put up some blackberries last summer and I eagerly jumped into the idea of a rustic tart. I used a couple granny smith apples and some golden delicious apples along with the berries and oh my goodness was it tasty.

Blackberry Apple Rustic Tart

1 1/2 cup flour
2 tablespoons sugar
1 1/2 cup unsalted butter + 2 tablespoons melted
1/3 cup cold water
4ish apples (depending on size)
1-2 cups blackberries

Slice apples into thin slices or small chunks. (See pictures) Toss with sugar and set aside. Make sure the blackberries are clean and don't have any stems on them. Set those aside too.

Put flour in a bowl and cut in butter. (First time to use a pastry cutter. LOVED IT!) Cut until it's about pea sized. Slowly add water and mix until it's doughy. Turn it onto a floured surface and knead it until everything is together. Roll out to 14-16 inches round and about 1/4" thick.

Place on a greased cookie sheet or put a piece of parchment paper under it. Lay the dough out and put the apples and blackberries in the center, leaving 2-3 inches around the edges. Fold the edges around the tart. The center will still be opened. Brush the melted butter over the top of the fruit and on the dough. Put in the oven at 400 for about an hour. (Mine only took about 40 minutes). It's done when the fruit is tender and the crust is golden brown.

I would say it's optional, but it should be a requirement to put whipped cream on top. Super simple and super delicious.

Mmm, whipped cream. Also pictured is one of Laura's butterscotch brownies.

Tuesday, March 2, 2010

How to Save a Life (Pasty Pies?)

Cooking for one is lame. Cooking for two is better. I made chicken pot pie to share for dinner on Monday and of course, there was left over bits. I always cut up too many potatoes and have too much gravy. So, I found something to do with it.

I was inspired by a recipe that I found on a blog called "The Other Side of Fifty." I dislike tuna a lot, but I liked the idea of biscuits and pie. I had bought some frozen biscuits the last time I was home because I was planning on making beef stew. I took out four biscuits the night before I was going to make my dinner. They thawed over night and when I got home from school that day, I rolled them out so they were about 6 inches across. I plopped the pot pie insides on one of the circles and then put the other rolled out biscuit on top. Then the edges got pinched and pushed down with a fork to make them look pretty. They baked for about 20 minutes at 325. Mom convinced me that it would be a better idea to pour gravy on top rather than mix it in so I did that and it was DELICIOUS! I want to make pot pie like this every time. The crust was buttery and delicious, the insides were nice and warm and the gravy was gravy-y as all gravy should be. I'm not one to turn down anything that has biscuits and gravy in the ingredients.

I've got enough for one more, and along with all the other leftovers I have plus going out to dinner when Alice is here tomorrow (!!!!!!!!!!!!) and then dinner with Terry this weekend, I am set on not cooking for a while. That's kind of against what I was planning on during my Spring Break, but I'm okay with it for now.

Pasty Pies (Like a pasty, but with pot pie filling)
Depending on how many you want to make, change the amounts. Here it is for about one.
1 smallish potato, peeled, cubed and boiled
2 chicken tenders, cooked and cubed (we don't buy breasts, but the tenders are a good size)
some frozen peas and corn or any other veggie you want
2 frozen biscuits for each pie, thawed

Preheat oven to 325.
Lightly grease a cookie sheet and place a rolled out biscuit on it. The biscuit should be about 6 inches across.

Pile on the insides (chicken, veggies, potatoes, etc) and cover with the other rolled out biscuit. Crimp the corners with your fingers or a fork. Poke a few hole for steam to escape and put in the oven for about 20 minutes. I'd follow the cooking directions of the biscuits since most everything else has already been cooked. The biscuits should be golden when they come out of the oven. Pour some gravy over it and enjoy!

Gravy (this will make a big batch that you can freeze for later use)
2 cups chicken stock
2/3 cup milk
1/3 cup flour
1/3 cup diced onion
1/3 cup butter

Melt the butter and stir in the flour and onion. Wait until it gets bubbly and smooth is. Take off the heat and add the milk and chicken stock. Return to the heat, stirring constantly until it thickens. It'll just take a couple of minutes.

Friday, February 19, 2010

Wizards (Lasagna)

I'm watching a really bad 70's movie called "Wizards" and I figured I could use this down time to write about a quite tasty meal I made last week. On Monday I made lasagna for the first time ever. What made me decide to make it? I had some cupcakes coming my way and I figured it was the least I could do to make dinner. I had lasagna noodles from one time when they were on sale. I had half a pound of venison and then went to the store for half a pound of ground beef. I also had all the cheese left over from my trip to New Harmony, Indiana. I made mozzarella, ricotta and cream cheese. All delicious. Anyways, the lasagna.


I used no boil noodles which was awesome. You just layer all the ingredients with the hard noodles in there and then bake it. The juices from the meat and the sauce allow the noodles to cook and come out quite tasty. Honestly, I ate it so much that I got really sick of it.

Here's the recipe.
1 oz box of Barilla no boil lasagna noodles
1 pound of ground beef, browned and drained
2 eggs
1 container (15 oz.) ricotta cheese
1/2 cup Parmesan cheese
2 jars of spaghetti sauce
4 cups of shredded mozzarella cheese

Preheat oven to 375*.

Mix eggs, ricotta, 2 cups of the mozzarella and parmesan cheese together.

In a 9x13 pan, cover the bottom with 1 cup of spaghetti sauce.

Layer: 4 noodles (slightly overlapping), 1/3 of the ricotta mixture, 1/2 the meat, 1 cup ricotta cheese and cover with 1 cup of the sauce.

Layer: 4 noodles (slightly overlapping), 1/3 of the ricotta mixture, and cover with 1 1/2 cups of the sauce.

Layer: 4 noodles (slightly overlapping), remaining ricotta mixture, remaining meat, and cover with 1 cup sauce.

Layer: 4 noodles (slightly overlapping), remaining sauce and 1 cup of mozzarella cheese.

Cover with foil and bake for 50-60 minutes.

Uncover for about 5 minutes so the cheese on top can brown. Let stand for 15 minutes before serving.

If the pan is shallow, only do 3 layers. I kinda made up how it all went together because I didn't have the full sauce requirements or standard cheeses. The mozzarella didn't melt well because it was homemade. It was really good for a first try at lasagna. I'd make it again.

Wednesday, January 27, 2010

8 Polish Foods of Christmas (Chocolate Chip Cookies)

I have forgotten how incredibly delicious homemade chocolate chip cookies are straight out of the oven. THEY'RE AMAZING!

Joe requested chocolate chip cookies the next time I decided to bake and share. So, since I'm working at MGA tomorrow, I made chocolate chip cookies. There is nothing special about them. They are just plain cookies. The best reaction is when Alex walks in the house and he stops mid conversation (talking to Jess on the phone) and gets super excited about the cookies that are cooling on the table. I had...3 of them? Maybe more. I can't remember. They're so good when they're all warm and gooey. Like I said, nothing special about them. I got the recipe off of the back of the chocolate chip bag.


Chocolate Chip Cookies!

2 1/2 cups flour
1 teaspoon salt
1 teaspoon baking soda
1 teaspoon vanilla
3/4 cups sugar
3/4 cups packed brown sugar
2 eggs
2 sticks of butter (they're cookies, they aren't going to be healthy even without that much butter)
1 3/4 cups of chocolate chips (11.5 oz bag from Nestle)
1 cup of nuts (optional. I usually skip it because 1. I never have them and 2. I suspect I'm slightly allergic to tree nuts)

Preheat oven to 375*.

Mix the flour, salt and baking soda in one bowl.

In another bowl, cream the butter, sugars and vanilla. Add the eggs, one at a time (or both if you're impatient) and mix everything together.

Stir in chocolate chips and drop by the spoonful onto ungreased baking sheets. Put in the oven for 9-11 minutes. Mine takes 8ish, but then, my oven is a little crazy.

Resist eating them until they've cooled slightly.

Should make 5 dozen, but I only got 4. I made larger cookies this time. I usually make little cookies. Small things just seem tastier.

Monday, January 25, 2010

Procrastination Station (Manicotti)


Remember that time I made ricotta cheese? Oh right, that was yesterday. I made something with it today! I made manicotti. Mmm. I had some manicotti noodles hanging around. Last summer I made them, but only used 8 of them because I didn't have a large pan. So...since I had the noodles and the cheese, I went to town making it. It came out really well.

Manicotti
1 3/4 cup ricotta cheese (I used just about all of the stuff I made yesterday, I didn't really measure)
1 1/2 cup mozzarella cheese
1/4 cup pesto
1 egg
12 manicotti shells
2 cups spaghetti sauce

Boil the manicotti noodles for about 7 minutes. They aren't going to be completely cooked through. They'll finish cooking in the oven. When they're done, drain them and rinse them in cold water. It'll make stuffing them easier.

While the noodles are boiling, mix together the egg, cheeses and pesto. Load all of that into a baggie with the tip cup off so it's easy to fill the noodles.

Put 3/4 cup spaghetti sauce on the bottom of a 9x13 pan.

Take the cooked noodles and fill them with the cheese mixture. It's easier to do it from both ends then trying to get it all to go down one side.

Lay the filled noodles in the pan and cover them with the rest of the sauce. Cover with tin foil and put in the oven at 350 for about 40 minutes. The noodles should be tender.

Sunday, January 24, 2010

I Love Cows (Ricotta Cheese)

I'm designing a dairy farm for studio, so yesterday I traveled out to the Howell/Hartland area to check out a few. I got to the Lyon's farm without getting lost (yay!) and then Terry and I drove to dairy farm #1. Lots of cows. Lots of manure. I'm going to pretend that it was mud caked on my shoes. Just let me pretend. They had calves. Lots of calves. 4 day old twins. THEY WERE SO CUTE! After that one, we went down the road and looked at some Oreo cows (Belted Galloways) and some miniature donkeys. Then we drove down the road again and looked at a huge dairy operation. 1,300 head, but not all of them get milked. They were all computerized and it was pretty intense. Then it was back to the Lyon's farm to look at the calves I had seen in October. Good times, even though I smelled like cow poo when I got home.

Since I'm designing a dairy farm, I decided to make some cheese. I wanted to test it out this weekend before I make it for real people next week. I went out to Whole Foods to look for rennet tablets, but I was informed that no one in the city has any. I bought some of the other stuff I needed for my cheeses and then came home. I ordered the rennet tablets and citric acid online and hopefully it'll be here at the end of the week. So I made ricotta today.

Ricotta Cheese
1/2 gallon/2 quarts/8 cups of whole milk, not ultra pasteurized
1 cup whole milk yogurt
1/2 cup heavy cream
2 teaspoon white vinegar
1 teaspoon salt

Put everything into a large pot and wait for it to boil. Let it boil for about 2 minutes. Everything will curdle and it'll start to smell like ricotta cheese.


While you're waiting for everything to boil, line a strainer with cheese cloth.


When everything has boiled and is ready, take the pot off the heat and pour it into the strainer. Let it strain for about 15 minutes. You want most of the liquid to get out. That's whey and it's a yellowish green color. Pick up the cheesecloth and wrap it around the cheese. Gently squeeze the curds so more liquid comes out. Then, it's done!


Apparently this best warm and can be refrigerated for up to 3 days.

Makes about 2 cups.

Tuesday, January 19, 2010

Muffins in the Oven (French Toast Fingers)

I'm waiting for my milk to curdle for another recipe so I figured I'd update. Right after I got back here from Christmas break I decided to test out one of my new cookbooks. Breakfast for dinner is one of my favorite dinners so I picked out French Toast Fingers. I used some of my grandma's strawberry jam (yummy) and used the powdered sugar quite liberally. I don't have enough experience in french toast making so there was still a lot of it that was kind of eggy. Not a big fan of that part. I'll stick to the store bought french toast sticks I think.


French Toast Fingers
from Dinner on a Dime

2 eggs
1/4 cup milk
1/4 teaspoon salt
1/2 cup strawberry preserves
8 slices day-old white bread

In a bowl, whisk the eggs, milk and salt; set aside. Spread preserves on four slices of bread; top with remaining bread. Trim crusts; cut each sandwich into three strips.

Dip both sides in egg mixture. Cook on a lightly greased hot griddle for 2 minutes on each side or until golden brown.

Top with powdered sugar.


Sorry for the lack of story tonight. I've been craving chocolate chip muffins all day and I'm 6 minutes and 54 seconds away from being able to make them. So close! There is also a hole in my sock. It makes me sad. It's just another sock to add to the growing pile of socks without a mate. I pair them together in hopes that they'll be friends.